Introduction
Signing an application
You'll see the following warnings if you have a successful build that has not been code-signed:
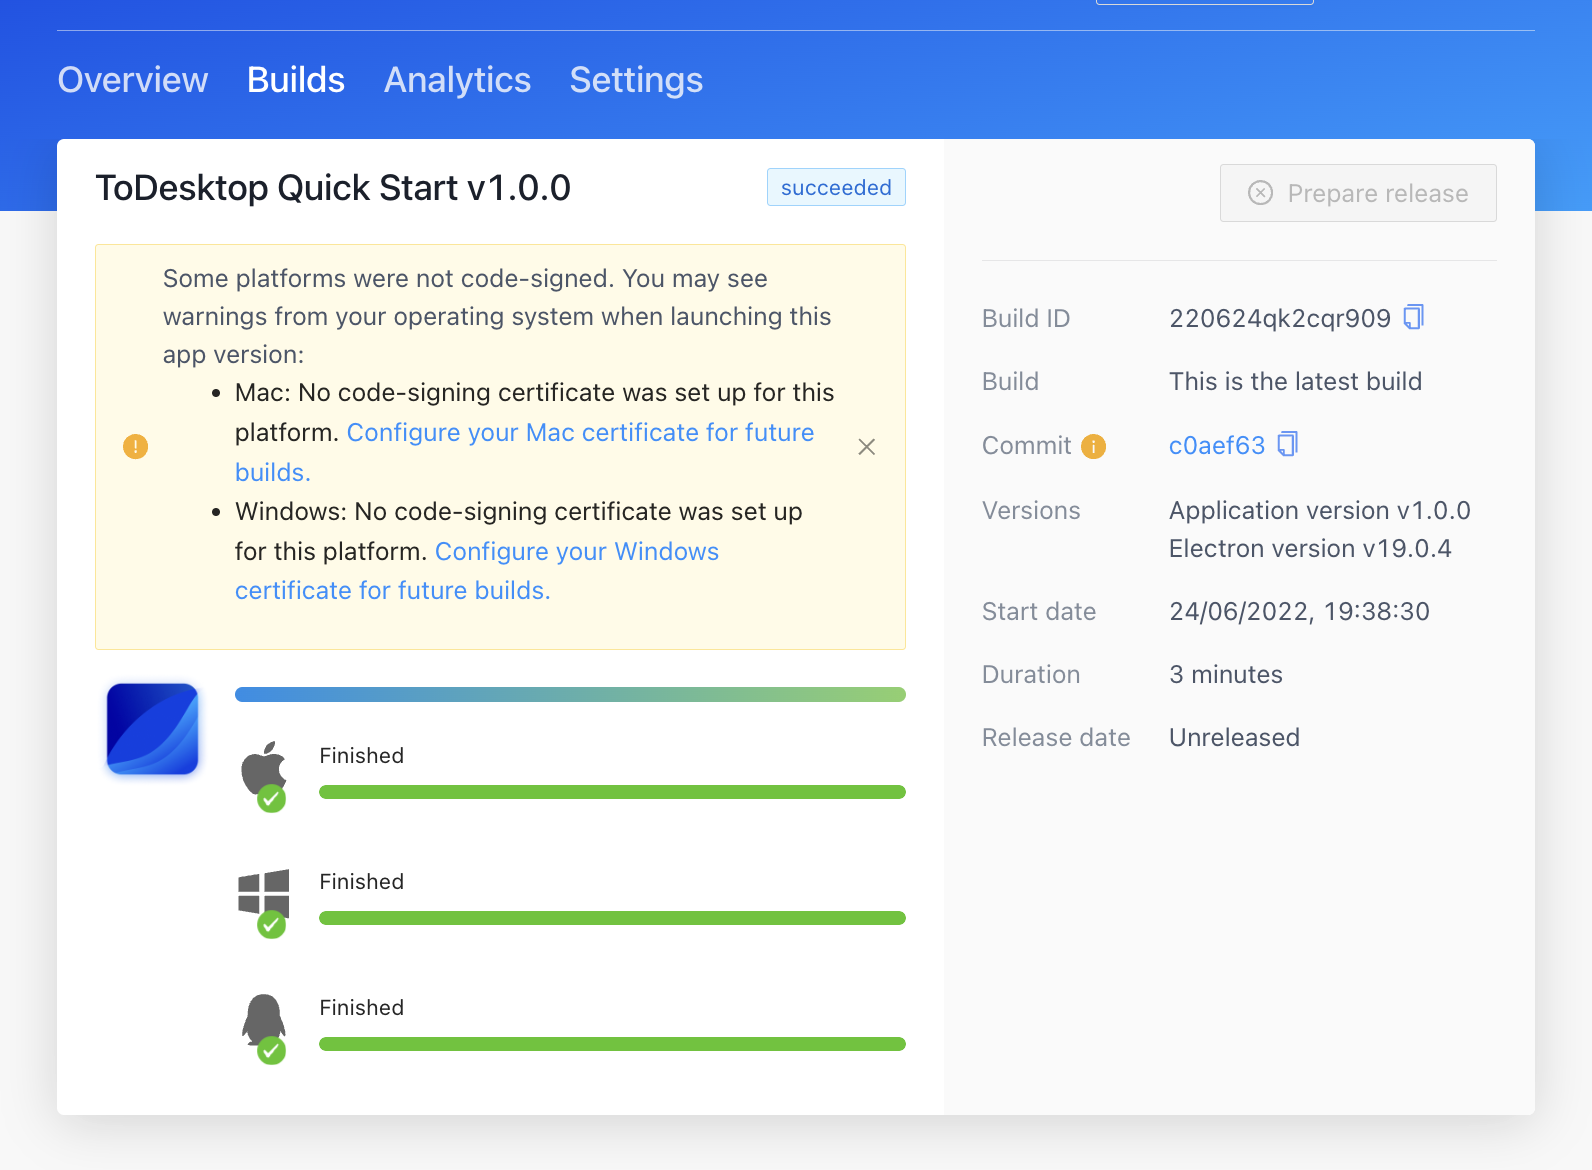
Code-signed certificates are required to distribute your application across Mac and Windows machines. These certificates can be uploaded by navigating to the ToDesktop settings page and then clicking on certificates.
If you want to test your build locally on macOS without a code-signing certificate then you will need to remove the quarantine flag. To do this, you can run:
Add certs for mac
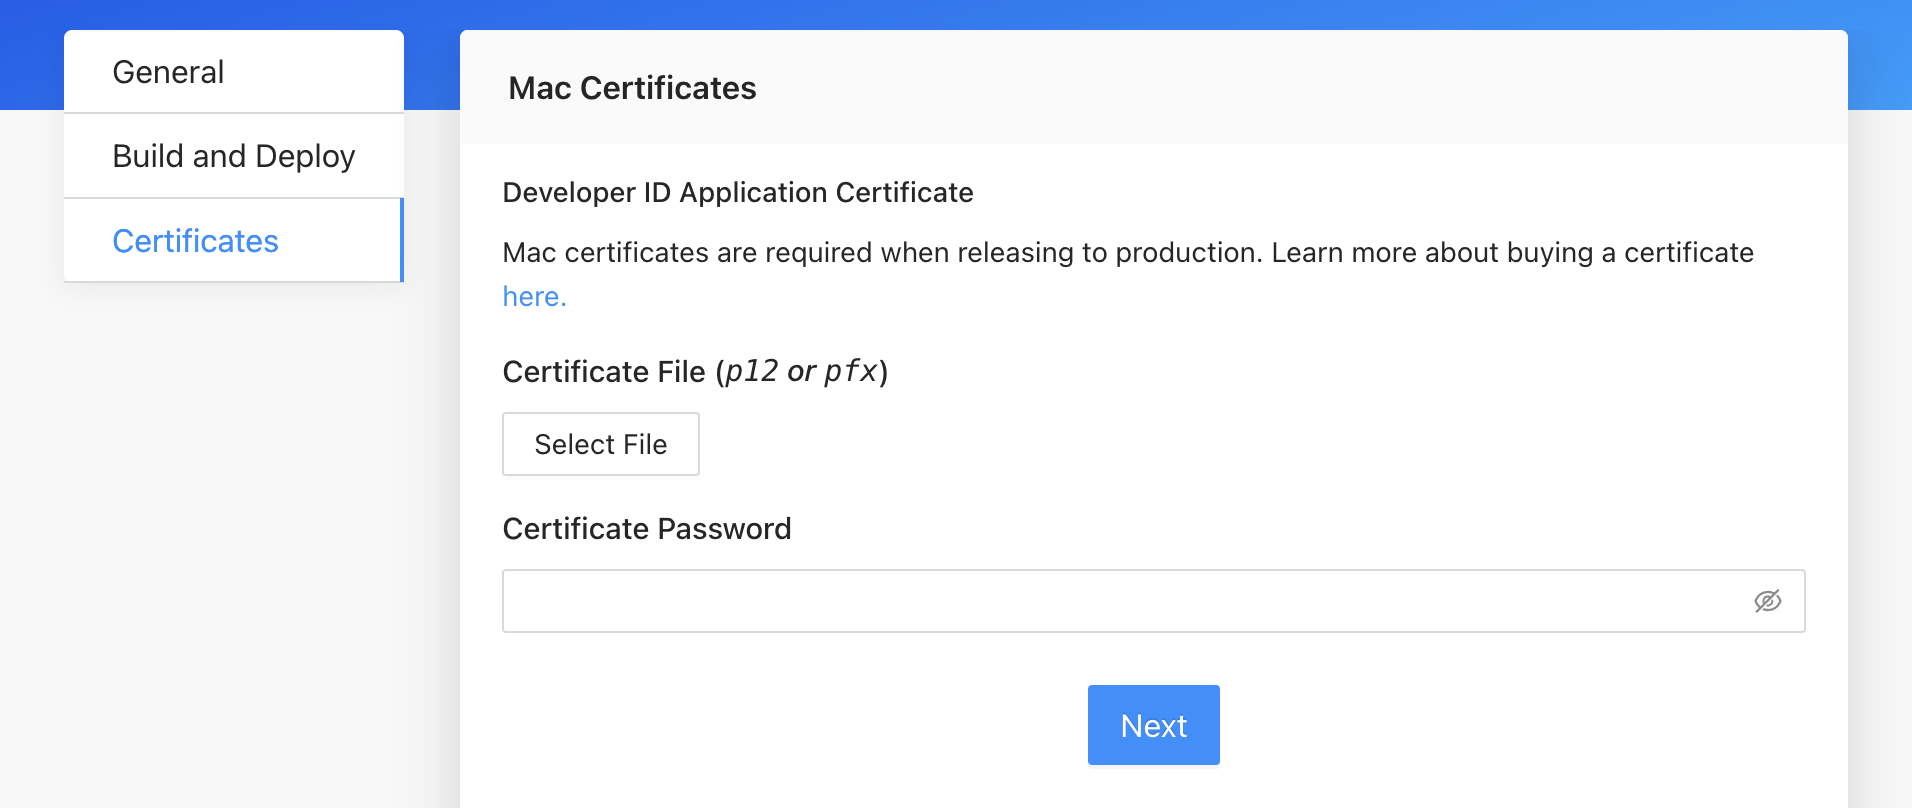
Adding a certificate for Mac apps is an involved process that involves multiple toolchains. ToDesktop currently supports the following mac certificate types:
- Developer ID Application: Required for code signing the majority of targets (DMG, ZIP, Universal Installer).
- Developer ID Installer: Required for signing the installer of a Mac PKG build.
- Mac App Store Development: Required for signing a Mac App Store development build.
- Mac App Store Distribution: Required for signing a Mac App Store production build.
- Mac App Store Installer: Required for signing the installer of a Mac App Store production build.
We'll list the set of steps for uploading a Developer ID Application cert below, but feel free to contact us at [email protected] if you're feeling overwhelmed:
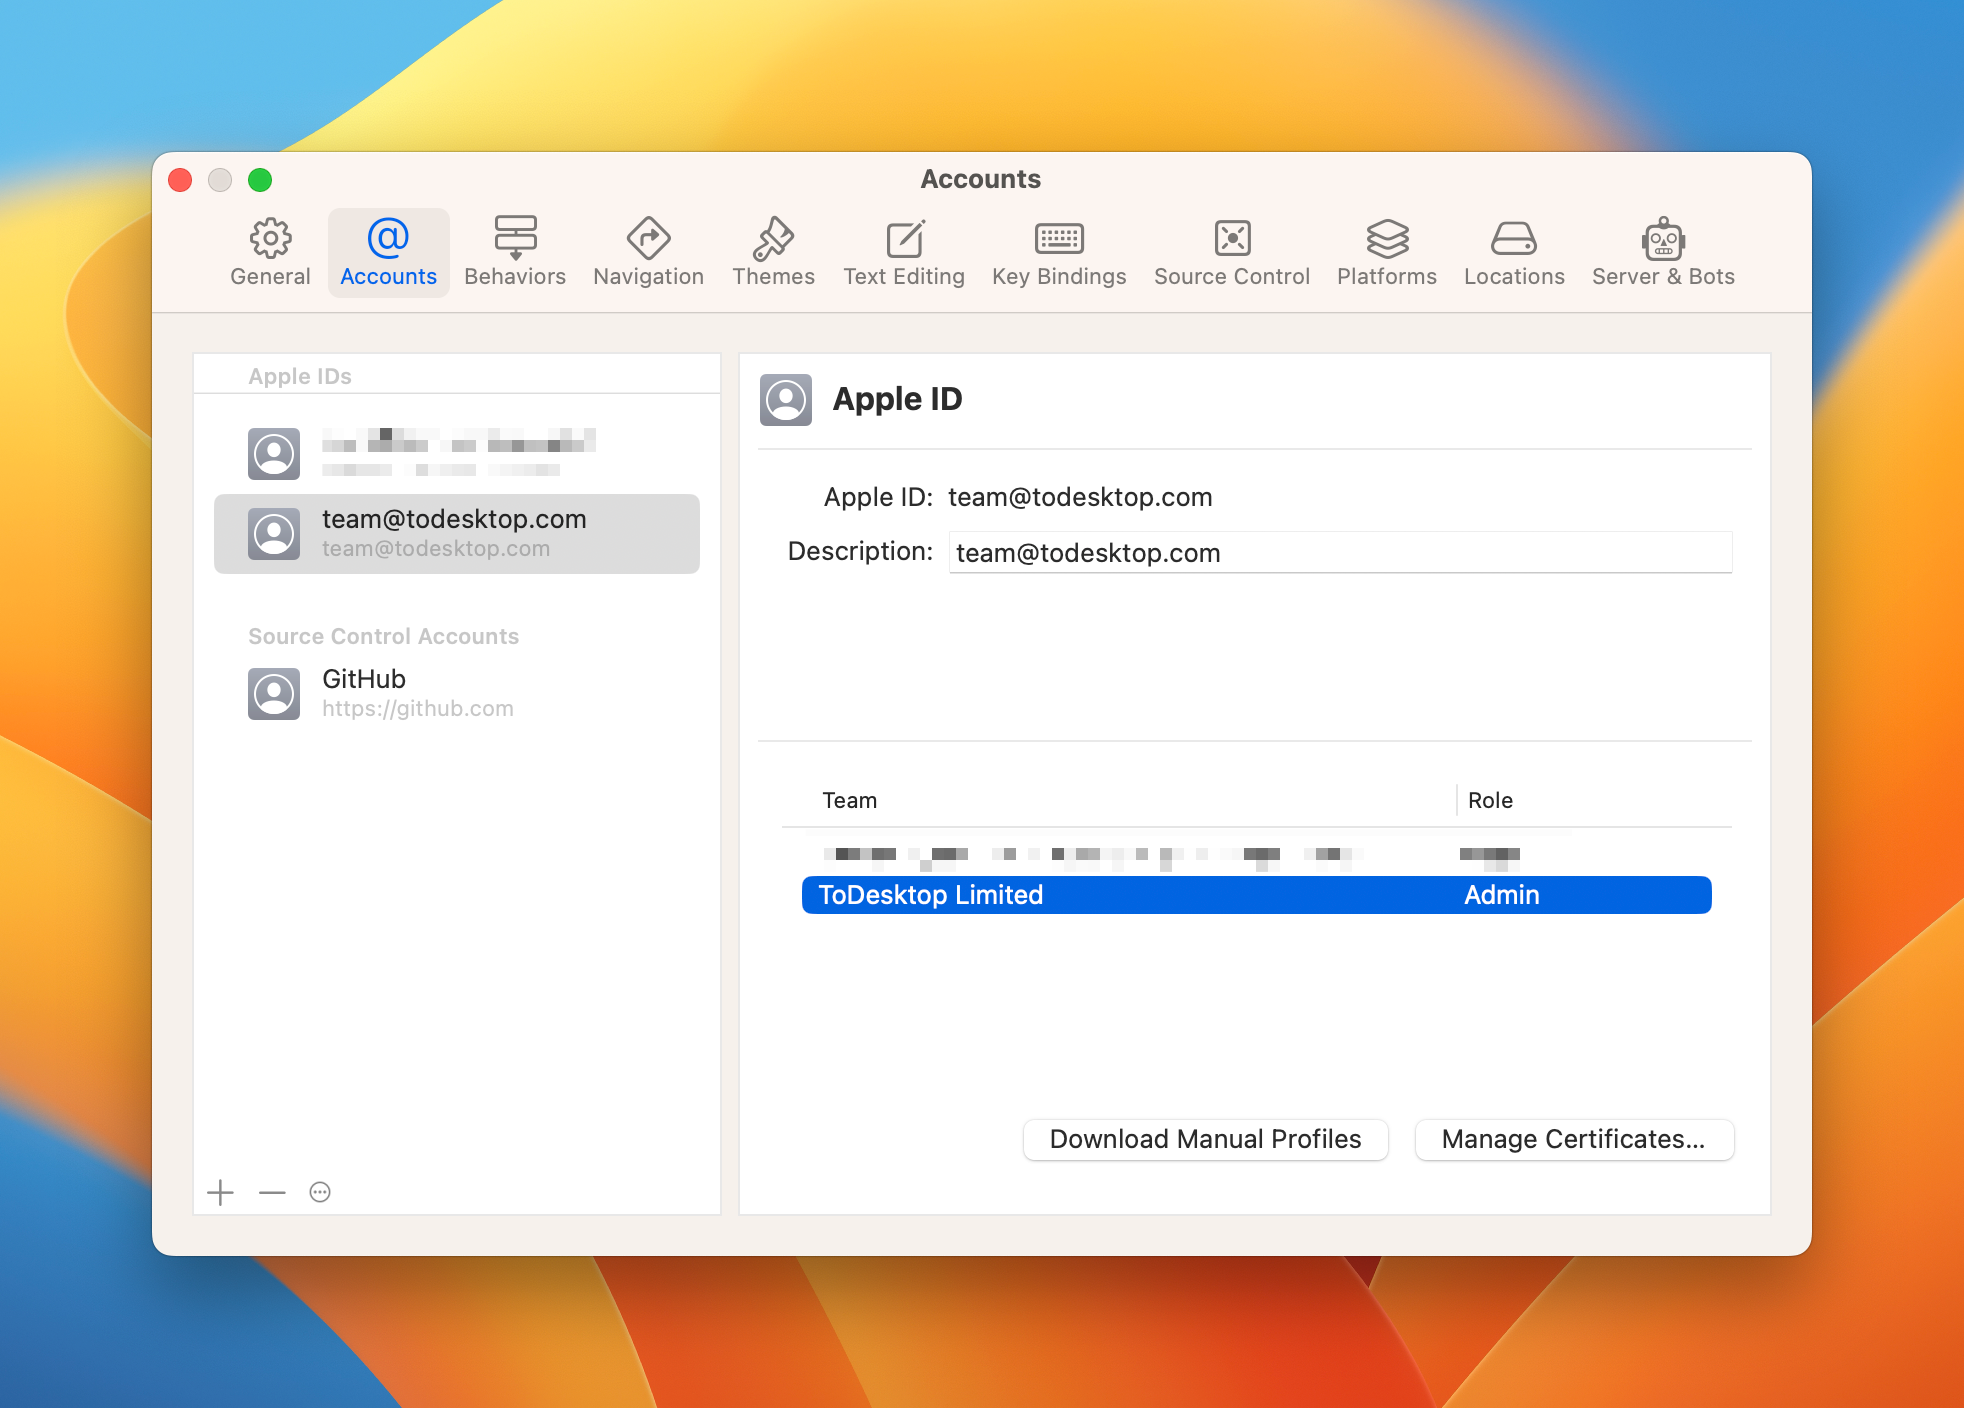
- Open XCode Preferences Window
- Click on Accounts tab and sign in
- Choose the correct team
- Click on Manage Certificates
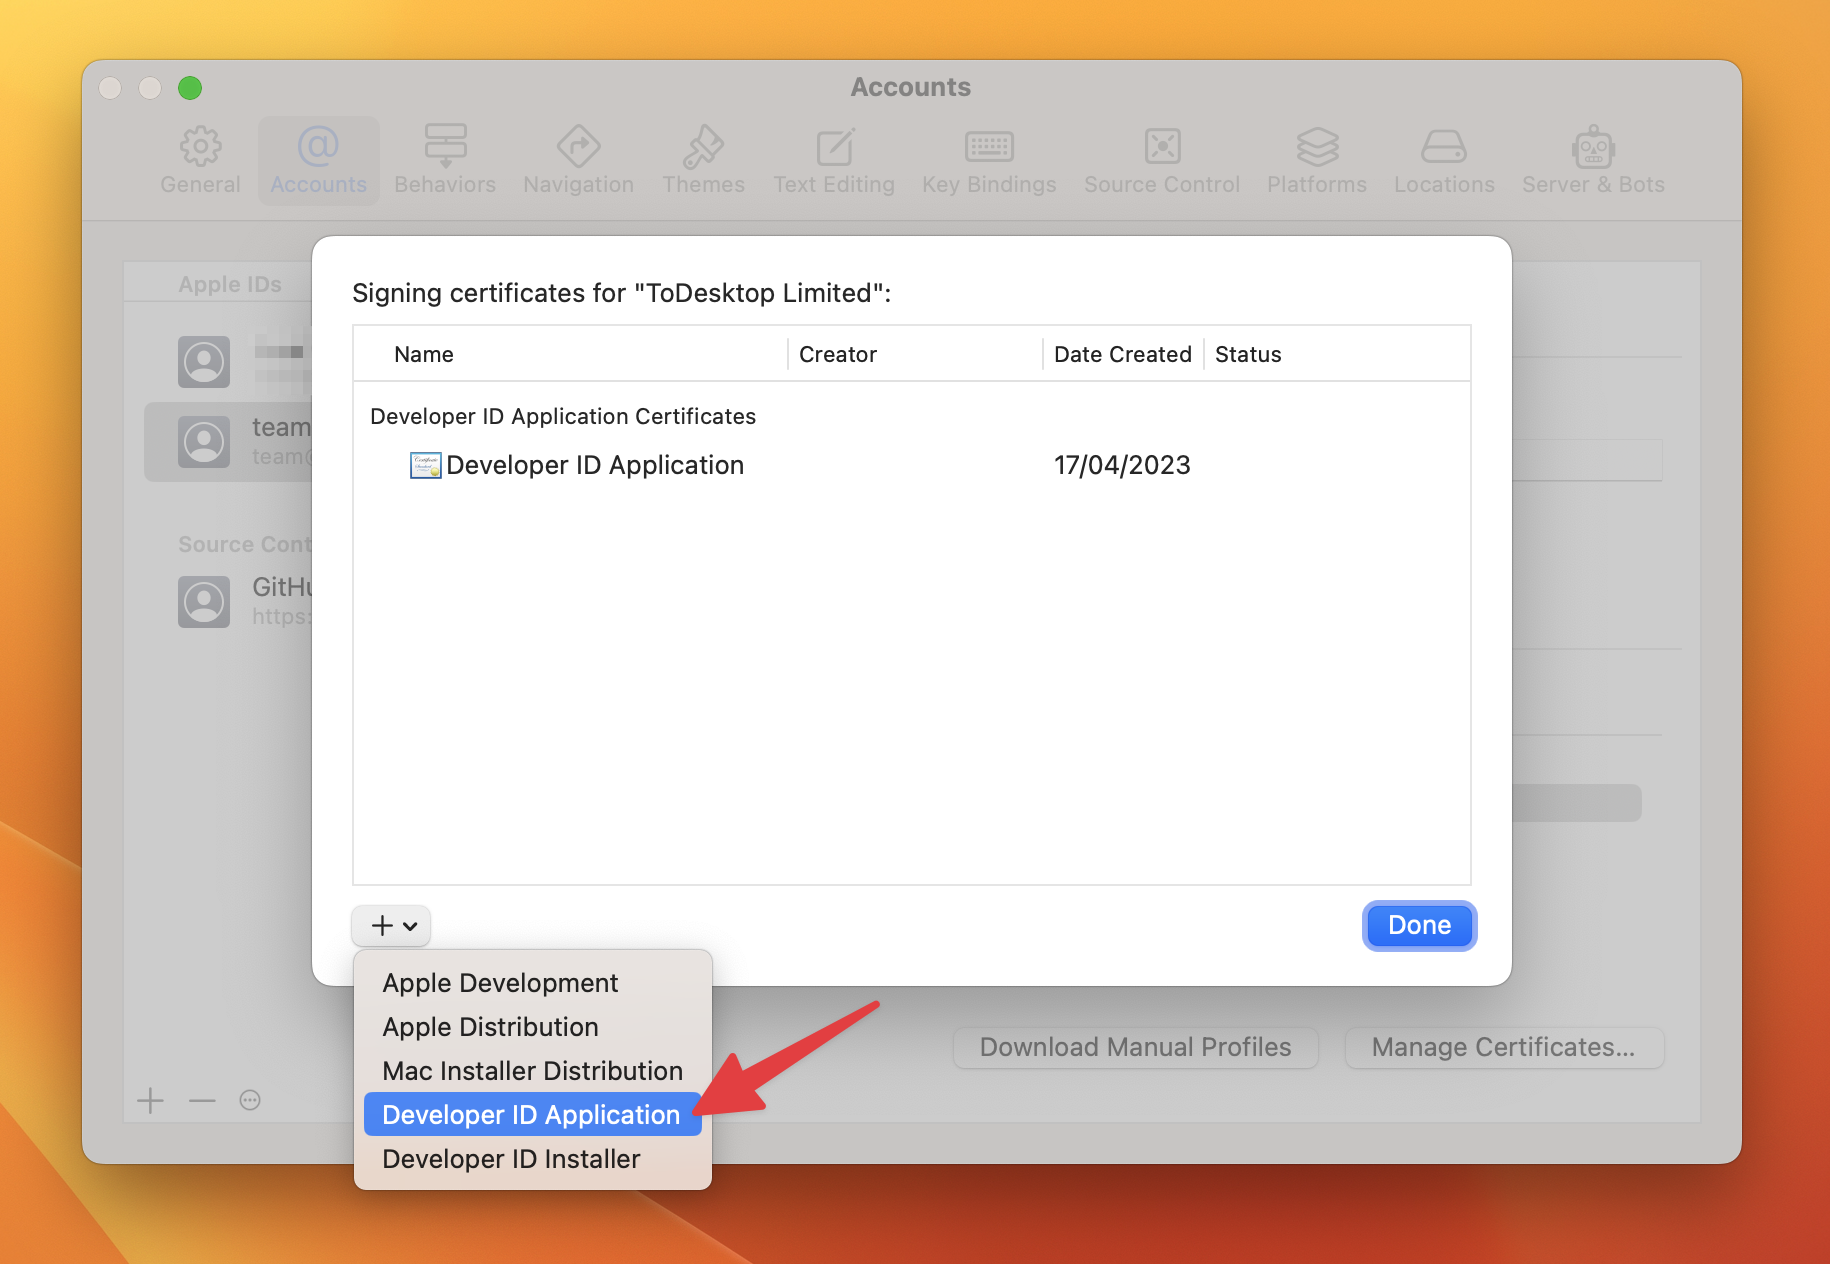
When adding your macOS cert, you should ensure that it is created using the correct “team” or “individual” Apple ID.
- In the new window, from the left bottom dropdown you can create a new Developer ID certificate
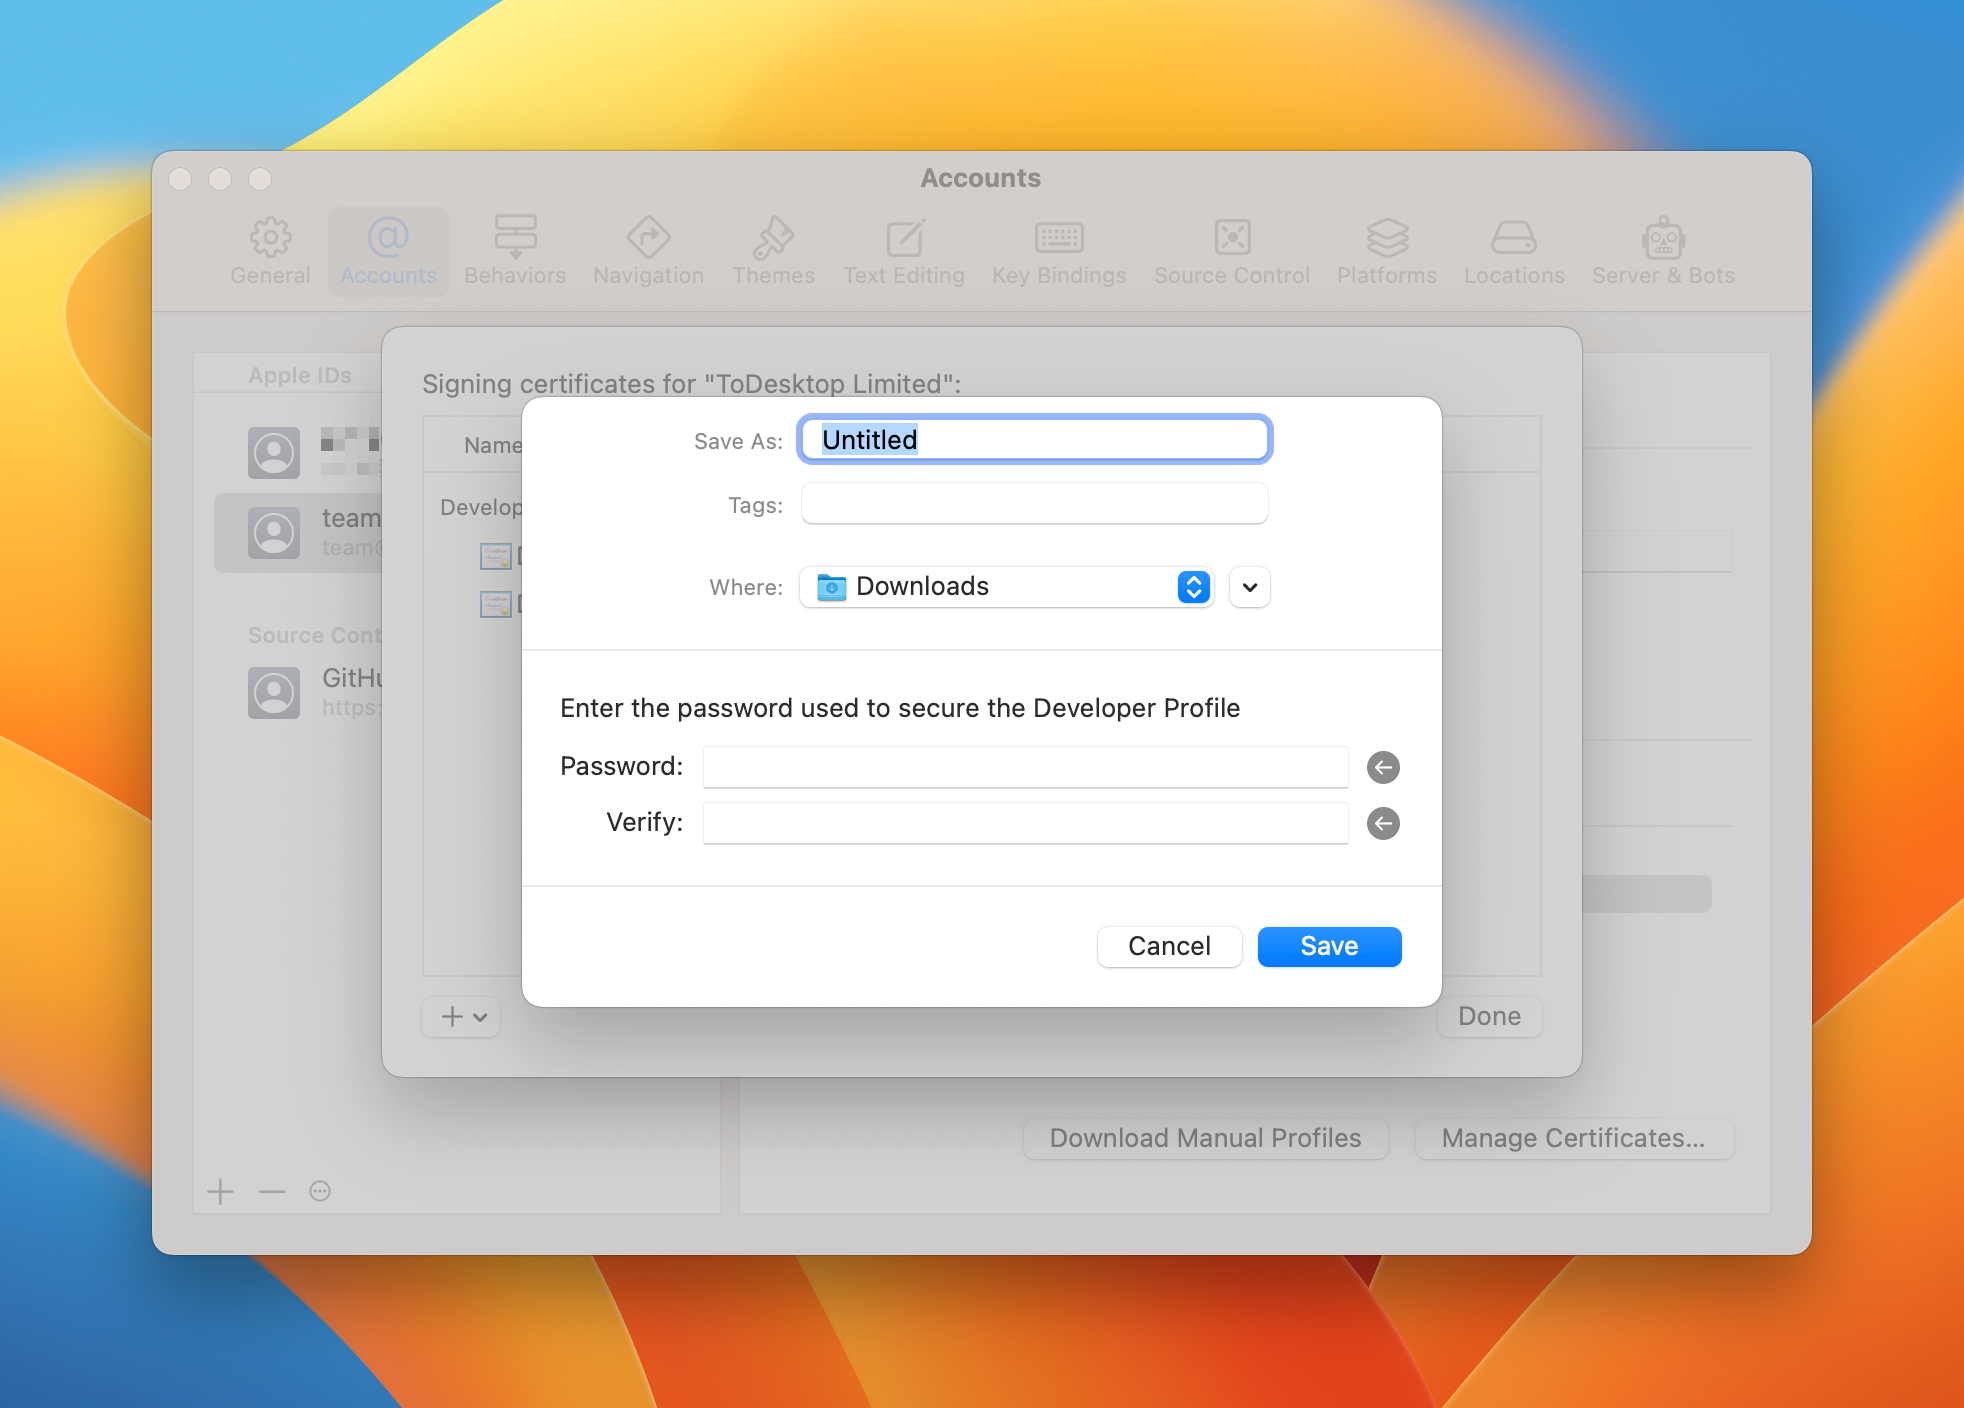
- From the certificate list, right click & Export
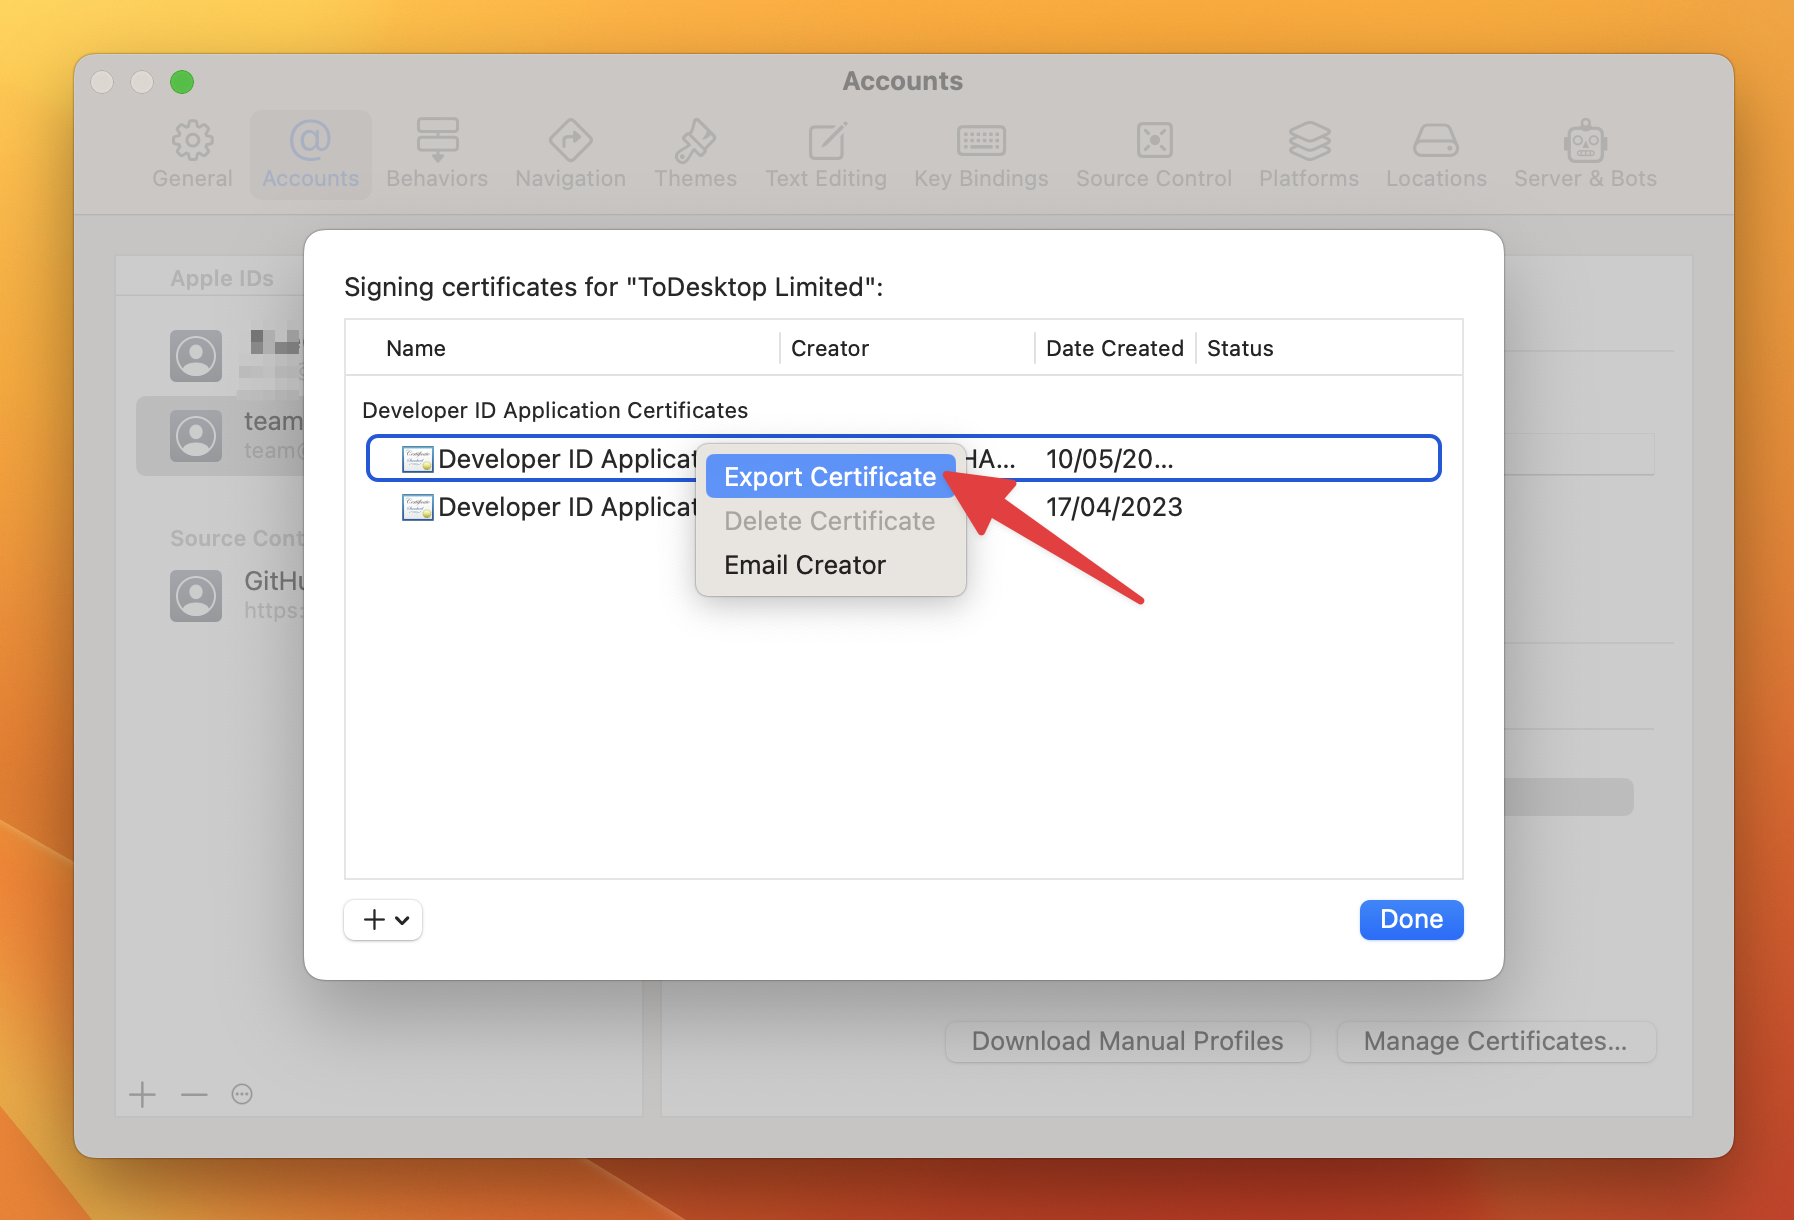
- Choose a password and export the
p12file
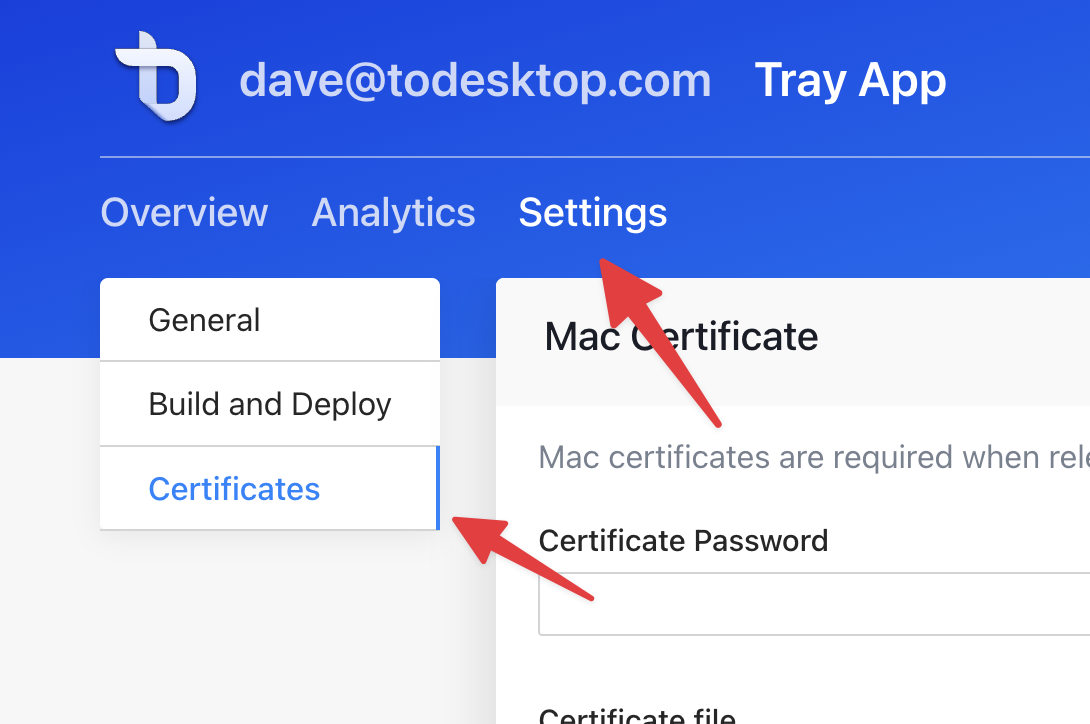
- Log into your ToDesktop dashboard.
- Go to Settings → Certificates → Upload Certificate
- Upload your new cert file and password.
- You may use your existing App-specific password or you can create a new one. If you wish to create a new one (or you don’t have access to your old one) then you can go to Apple's Developer site and choose the “App-Specific Passwords” option.

- Click “Save Changes” on the ToDesktop dashboard and all of your future builds will now be signed with the new cert.
Adding certs for windows
On Windows, you can choose between a File or an EV certificate. Setting up an EV certificate is more expensive and involved, but will get you immediate “reputation”. This means that users of your desktop app will never be warned that your software is untrusted.
The steps below are for purchasing a certificate with GlobalSign. If using another provider (such as Digicert), please make sure that you purchase a certificate for deployment to a HSM (rather than a USB token).
Order the cert online with GlobalSign (make sure that you order code signing for HSM).
- Process is documented here: https://support.globalsign.com/code-signing/ordering-ev-code-signing-certificate-hsm-based
- Make note of your temporary password for later.
Go through the vetting process with Globalsign. This takes a couple of days and usually involves verifying company details.
Globalsign will send the certificate generation link.
- You will need the temporary password that was created earlier
- More details of this process are here: https://support.globalsign.com/code-signing/download-and-install-code-signing-certificate-hsm-based
You can now use ToDesktop to create a CSR will be used on the GlobalSign portal.
Go to the Certificates settings page via the web app
Scroll down to Windows certificate and choose “EV (GlobalSign)”
You can skip the first few steps as you have already completed them.
Choose “Generate Cert” and then click the “Generate CSR” button
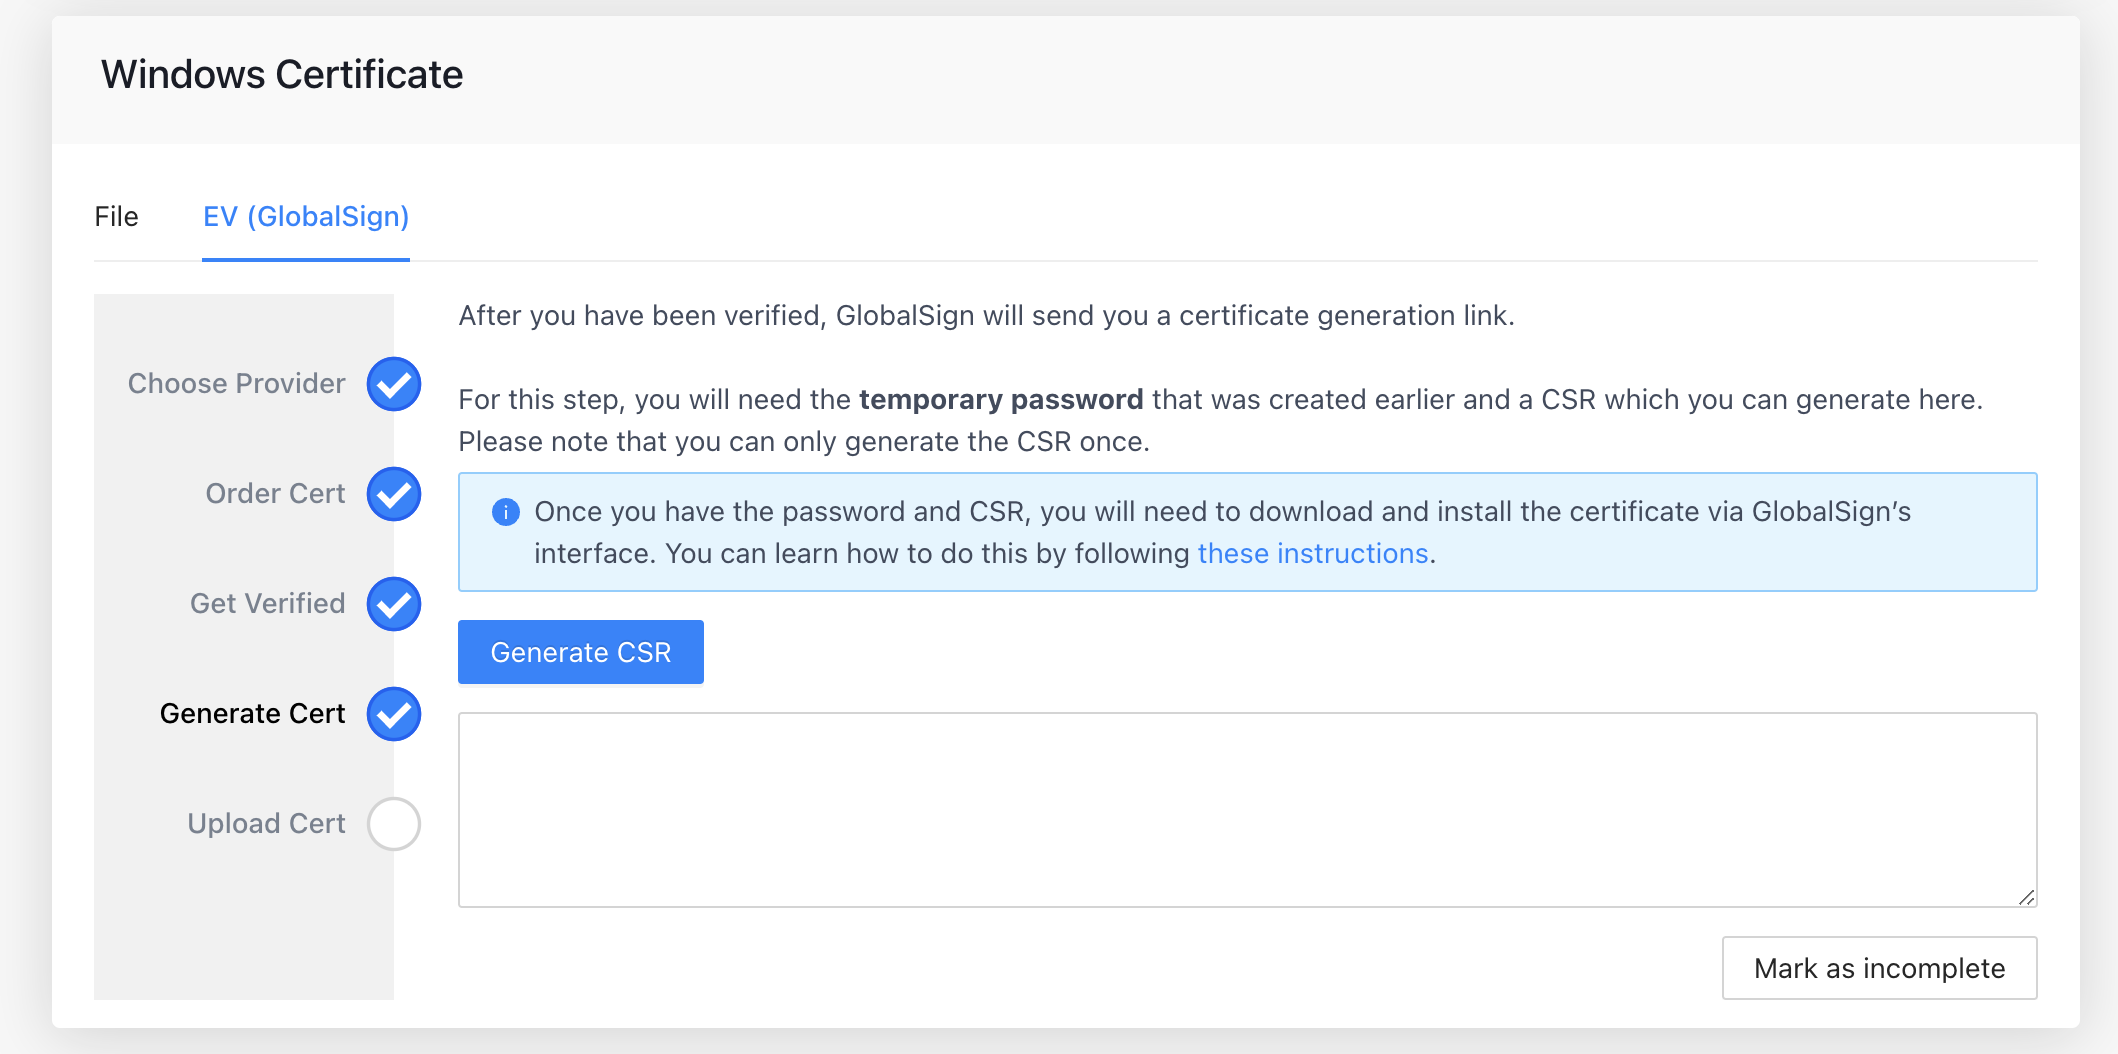
Now you can copy the CSR that ToDesktop has generated into the GlobalSign portal
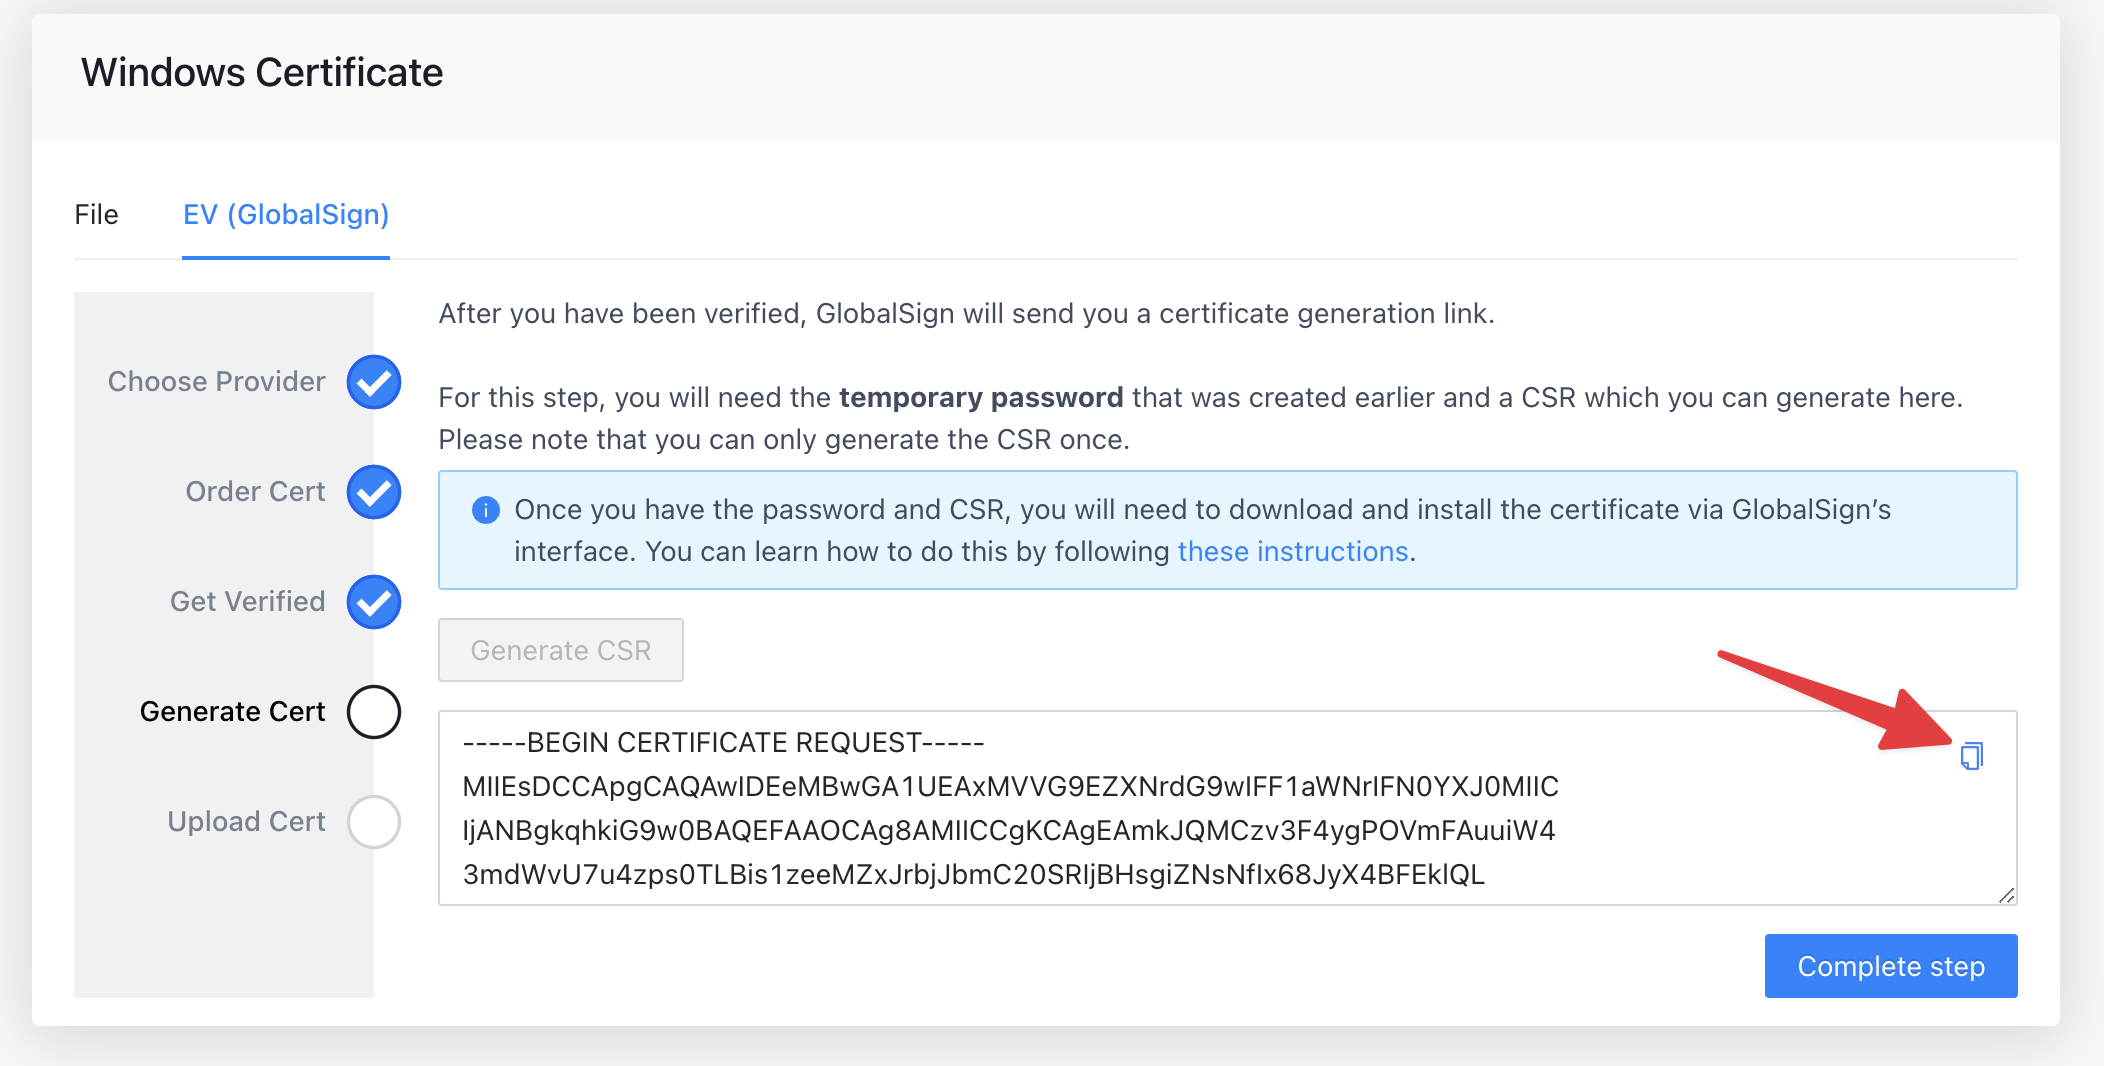
Finally, GlobalSign will provide you with a certificate file that you can upload to ToDesktop in the next step.
Once your code certificates have been uploaded, you can visit Part 3 of this guide to learn how to release and distribute your build to customers.